

PowerFlex 525 drives are widely used low-voltage drives that are manufactured by Rockwell Automation under the Allen-Bradley brand. These drives are part of Rockwell Automation’s Integrated Architecture portfolio of products, which means that they have premier integration with Studio 5000 Logix Designer and Logix 5000 PLCs.
In this article, we’ll show how premier integration makes it easy to configure PowerFlex 525 drives in Studio 5000 Logix Designer. By the end of the article, you will know how to add a PowerFlex 525 drive to a Studio 5000 Logix Designer and how to configure the drive using its Add-On Profile.
At that stage, you will be ready to integrate the drive into a larger control system and we’ll cover how to do that integration in our next blog.
Add a PowerFlex 525 Drive to a Studio 5000 Logix Designer project
In Studio 5000 Logix Designer, I have created a new project and gone online with the PLC.
In the Controller Organizer, I scroll down to the I/O Configuration section and right-click on the Ethernet node.
In the context menu that opens, I select New Module to open the Add New Module dialog box.
In the dialog box that opens, I can use the search bar to filter down to the drive that I will use in this demo, which is a PowerFlex 525-EENET.
I select the drive and click Create to add it to the project.
After clicking Create, the New Module dialog opens which lets me enter the basic information for the drive.
In this dialog, I set the name, IP address, and drive rating fields and leave the rest of the fields at their default value. Once the drive is configured, I click on OK to close the dialog box and then click on Create to finish adding the drive to the project.
Now, I can see that the drive has been added to the I/O Configuration tree.
Since this drive is part of Rockwell Automation’s Integrated Architecture platform, all of the data for the drive is automatically available in the project. I can see that by closing the Select Module Type dialog and opening the Controller Tags editor.
In the Controller Tags editor, I can see that tags have been automatically created for the drive that include descriptive names. Once the drive is configured, I can use these tags to monitor and control the drive.
Configure a PowerFlex 525 in Studio 5000 Logix Designer
For now, I close the Controller Tags editor, and reopen the drive’s profile by double-clicking on it in the Controller Organizer.
I can use this profile to configure and commission the drive.
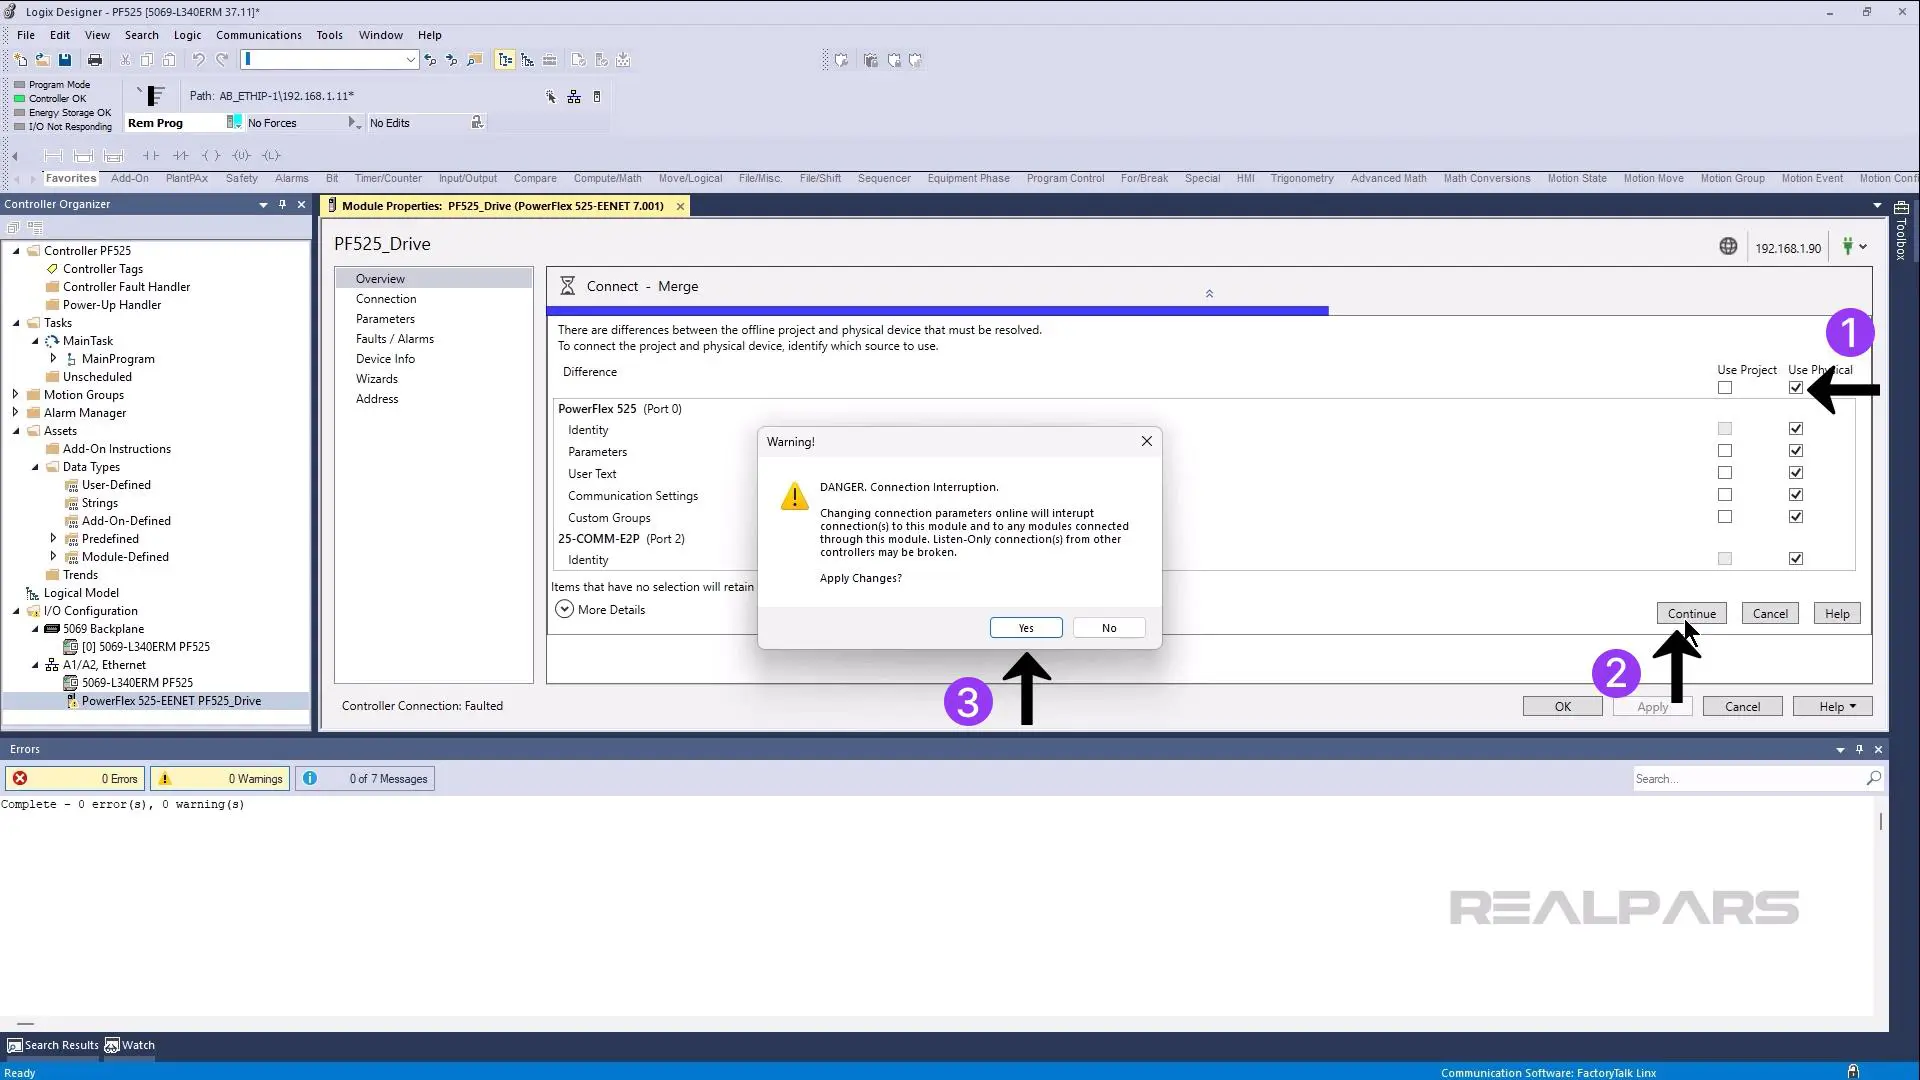
Since we have added the drive online, the drive’s parameters are synced when we open the profile. In the Overview screen, I select Use Physical and click Continue to upload the parameters from the drive into my project.
In the warning dialog, I click Yes to continue uploading the parameters.
Now I am ready to configure the drive.
If I want, I can configure the drive manually using the Parameters tab. This tabs shows all of the parameters that are available for the drive.
Since this is such a big list, it can be useful to filter it. To do that, you can use the Parameters dropdown to show specific groups of parameters including parameters that are commonly use for specific applications.
You can also use the Show Non-Defaults button to show only the parameters that have been changed from their default value.
You can see that some parameters have already been changed when we added the drive to the project.
If you are not a drive expert, you can also use the built-in wizard to configure your PowerFlex drive. To do that, I can activate the Wizards tab and then click on the Start button in the PowerFlex 525 Start Up Wizard row.
This Wizard takes you through the process of setting up a new drive in a logical way and includes steps to verify the direction of the motor.
In the direction test step, you can press the red button to clear any faults from the drive, set a reference speed, and then press Jog to jog the motor and verify that it turns in the correct direction. If the drive turns in the correct direction, click Yes to register that the direction test has passed.
After running through the wizard, you can see a Summary of the changes that are being made to the drive before downloading the parameters to the drive. I can click Finish to send the configuration to the drive, and I am now ready to control and monitor the drive in my PLC code. We’ll see how to do that in our next article.
Wrap-Up
In this article, I showed you how Premier Integration and Add-On Profiles make it easy to add a PowerFlex 525 drive to a Studio 5000 Logix Designer and configure it using parameter lists or wizards.