
Allen-Bradley PowerFlex 525 drives are popular variable frequency drives manufactured by Rockwell Automation that can be used as standalone drives, integrated into a micro control system, or integrated into a Logix 5000 system.
When you are using PowerFlex 525 drives as standalone variable frequency drives or integrated in a micro control system, you configure them using Connected Components Workbench. Connected Components Workbench is a free development environment that is used to program Micro800 PLCs, build HMI applications for PanelView 800 HMIs, and configure PowerFlex 525 drives.
In this article, I’ll show you how to configure a PowerFlex 525 drive in Connected Components Workbench.
Add a PowerFlex 525 Drives in Connected Components Workbench
In Connected Components Workbench, I create a new project by clicking on File > New. In the new project dialog, I enter a name for the project and select a storage location. Finally, I click Create to create the project.

After the project has been created, the New Device dialog automatically opens.
In this dialog, I will add a PowerFlex 525 drive to the project. To do that, I expand the Drives folder, then the PowerFlex 520-Series folder, and finally select the PowerFlex 525 drive.
After selecting the drive, I click Select to add it to my basket and then click Add to Project to close the dialog and add the drive to the project.

After adding the drive to the project, the drive’s Device Definition dialog opens automatically. In this dialog, I give the drive a name and click OK to add it to the project.
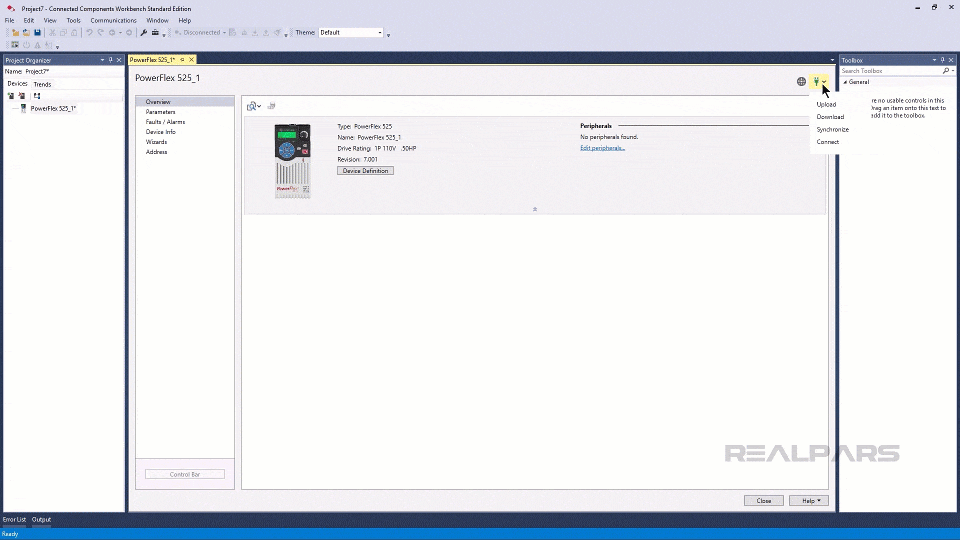
The Device Definition dialog updates to give us more options.

Now we can use the connect menu to connect to a physical drive and interact with the drive. Specifically, we can connect to the drive, upload parameters from the drive, download parameters to the drive, or synchronize parameters with the drive.
When you synchronize parameters with the drive, you can choose which parameters are uploaded from the drive and which ones are downloaded.
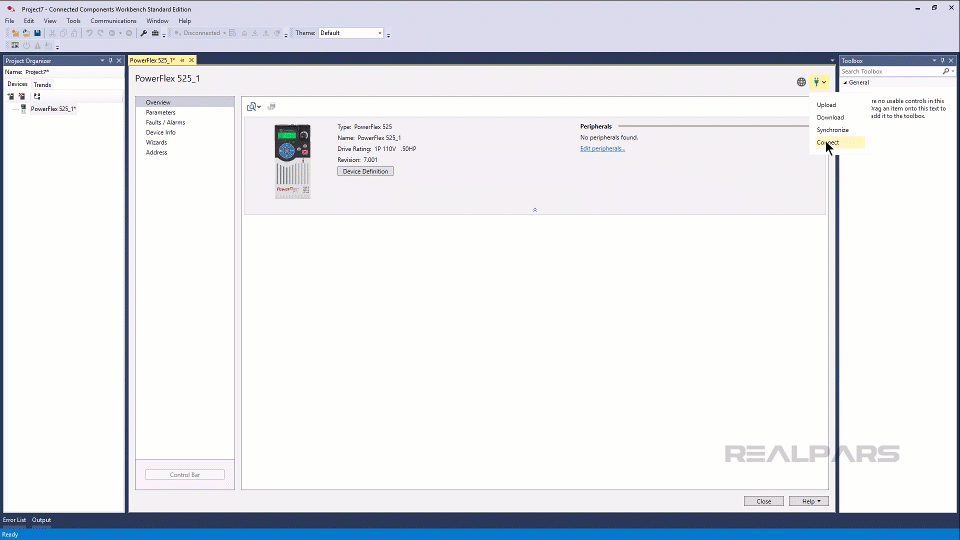
In this case, I will connect to the drive. To do that, I open the Connect menu and select Connect.
To connect to the drive, we have to specify the path from the computer to the drive using the Network Browser that opens automatically.
In this case, the drive is connected directly to my computer, so I can expand the EtherNet/IP driver, select the drive, and click Continue to set the path.
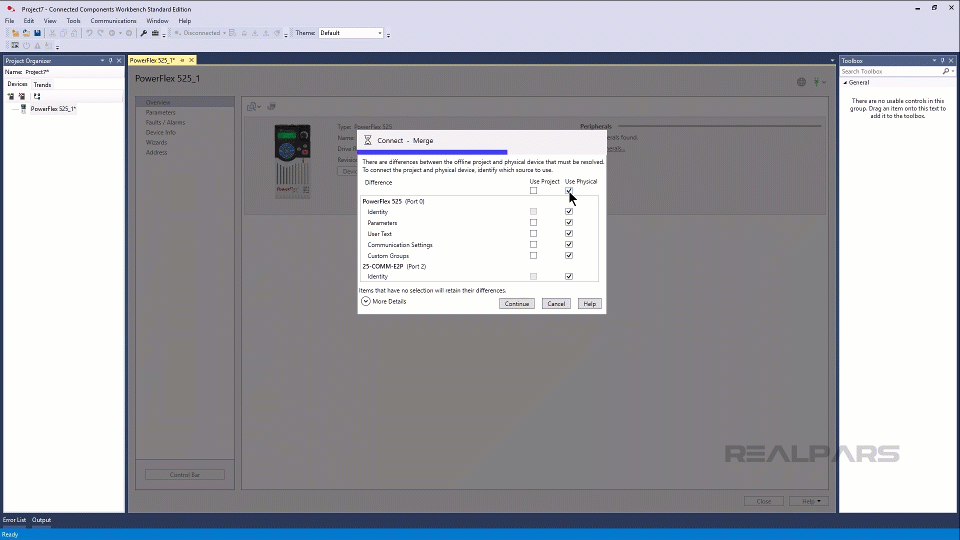
The parameters in the project and drive have to be synchronized. In this case, I will upload all of the parameters from the drive by selecting the Use Physical checkbox and clicking Continue.
You may notice that the Device Overview has been updated to show the details of the physical drive.
Configure a PowerFlex 525 Drive using parameters
We can configure a PowerFlex drive in multiple ways.
The first way is to manually configure the different parameters.
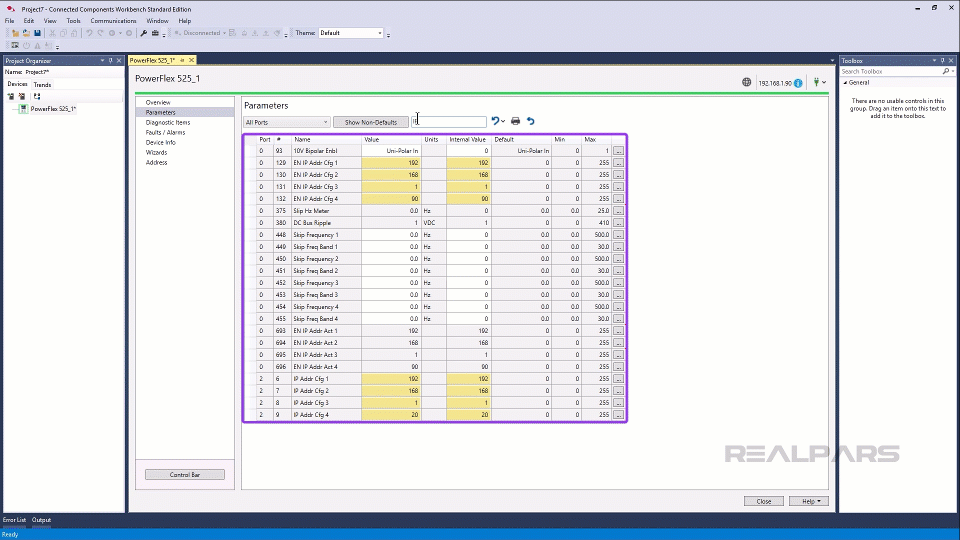
To access the drive’s parameters, you can select the Parameters page in the left pane.
This page shows a list of all the drive’s parameters. To make configuration easier, you can filter this list in different ways.
You can filter the list using the search bar. For example, I can search for “IP” to see the IP address-related parameters.
I can also select the Show Non-Defaults option to view only the parameters that have been changed from the default values.
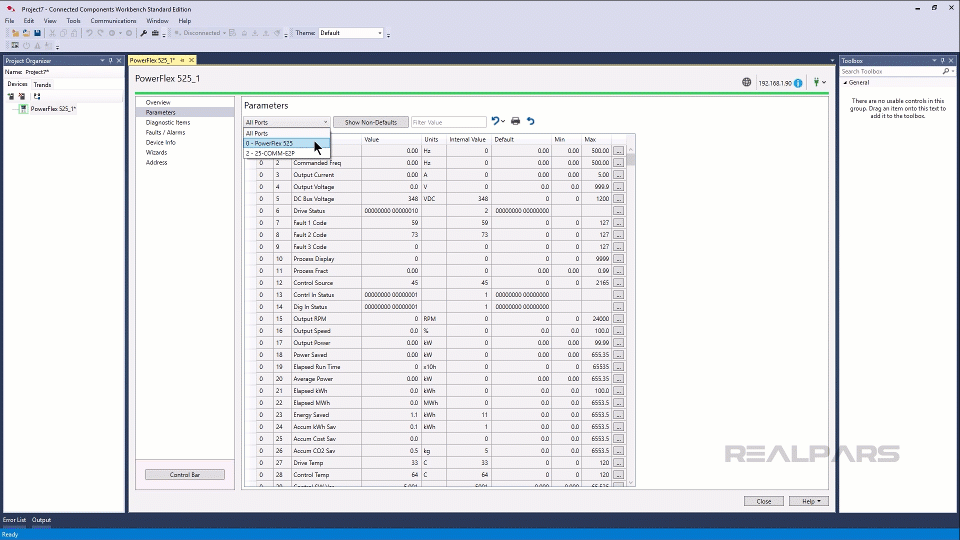
Finally, I can look at parameter groups. To do that, I select 0 - PowerFlex 525 in the All Ports dropdown.
In the Parameters dropdown, you can select groups of parameters to show.
Some of these groups are based on functionality. For example, the Basic Program group contains the most basic parameters that you need to configure in a simple application.
Other groups are based on applications. For example, the Conveyor group shows the parameters that are important for Conveyor control applications.
If you want, you can also create a custom parameter group that displays up to 100 parameters that you select.
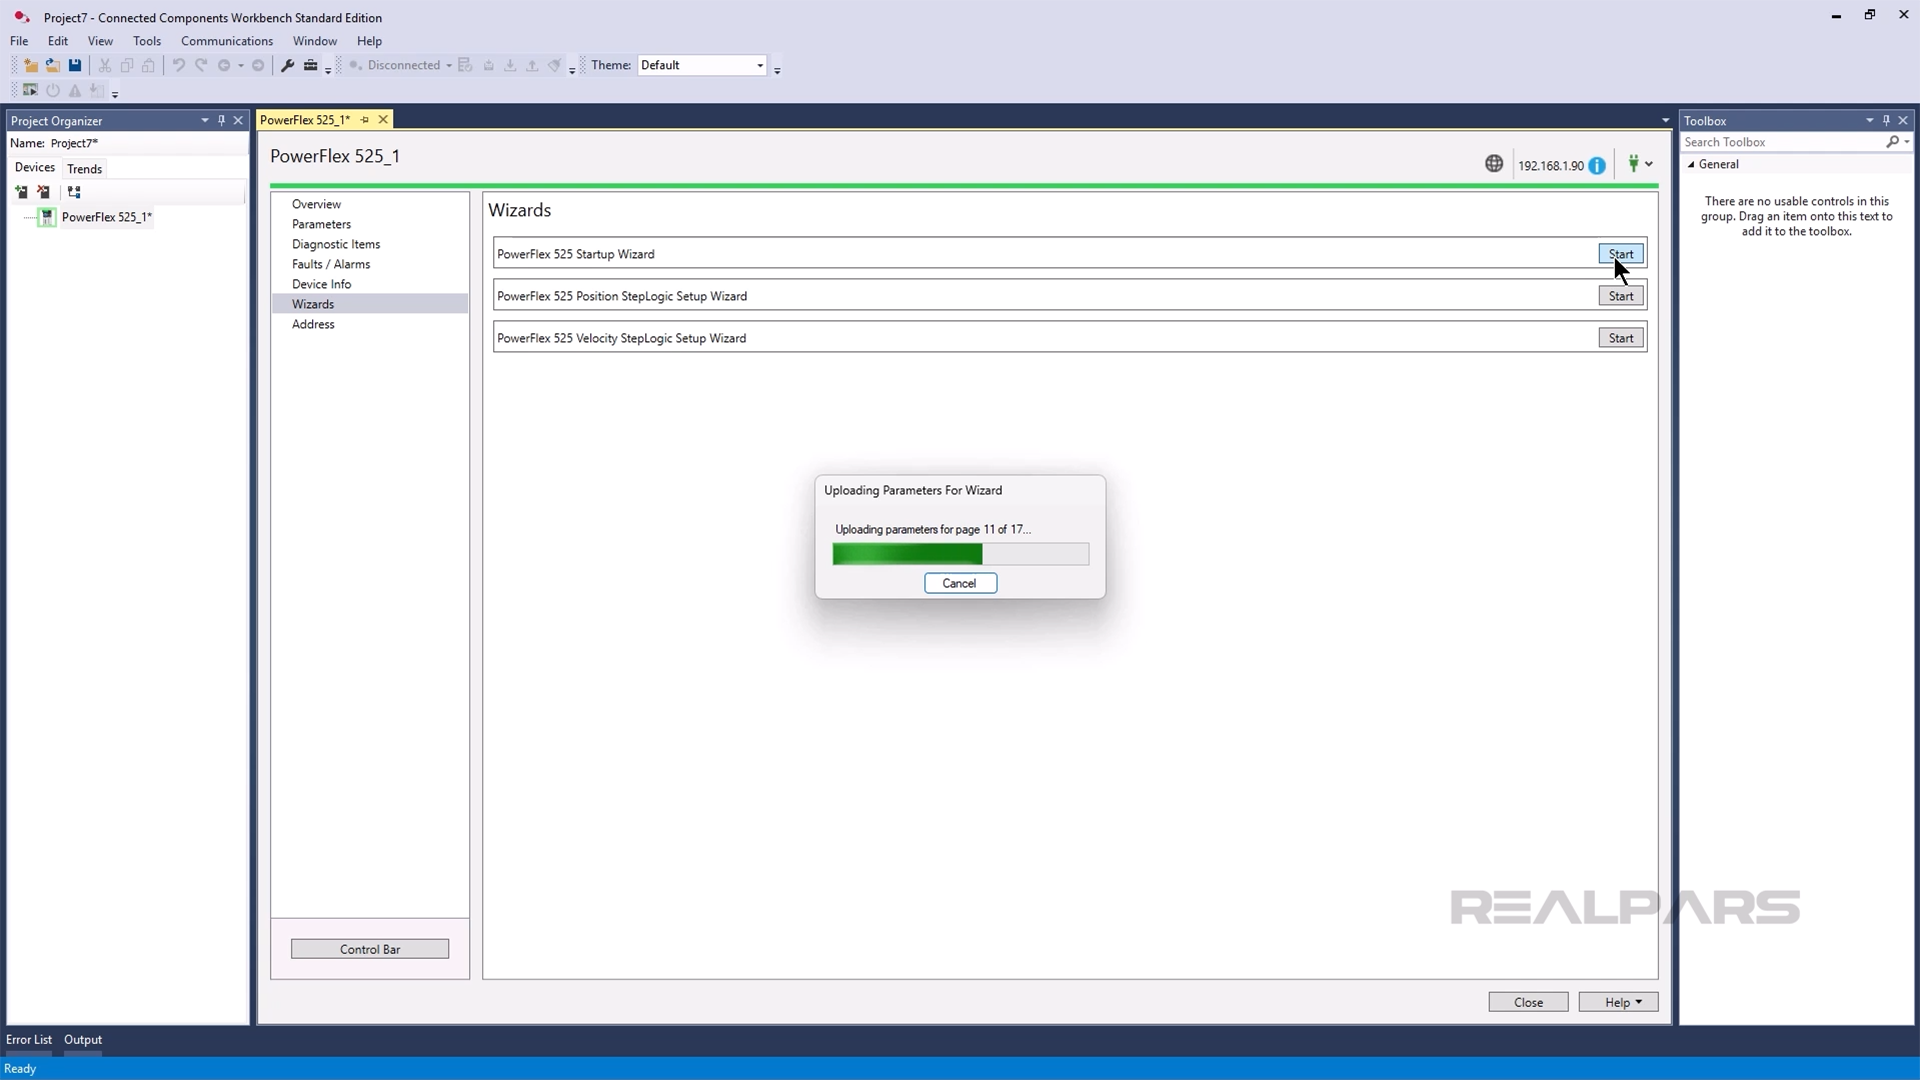
If you don’t want to go through individual parameters, you can also configure a PowerFlex 525 drive using the Start Up Wizard.
Configure a PowerFlex 525 Drive using the Start Up Wizard
To open the Start Up Wizard, select Wizards in the left pane and then click on Start beside the Start Up Wizard.
This wizard walks you through the steps to configure a PowerFlex 525 drive in a logical, structured way.
As you work through the wizard, you can configure parameters related to motor control, motor data, and perform basic tests like verifying that the drive is turning in the correct direction.
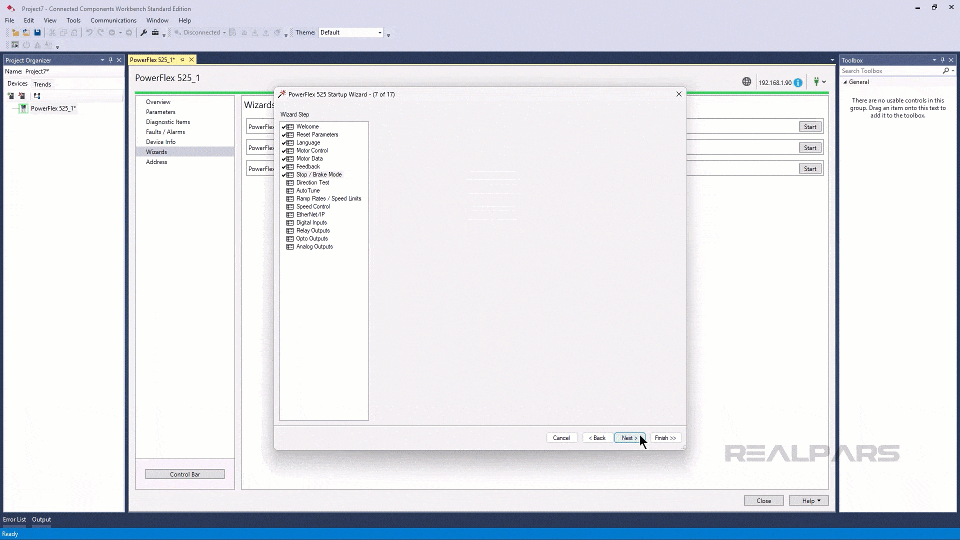
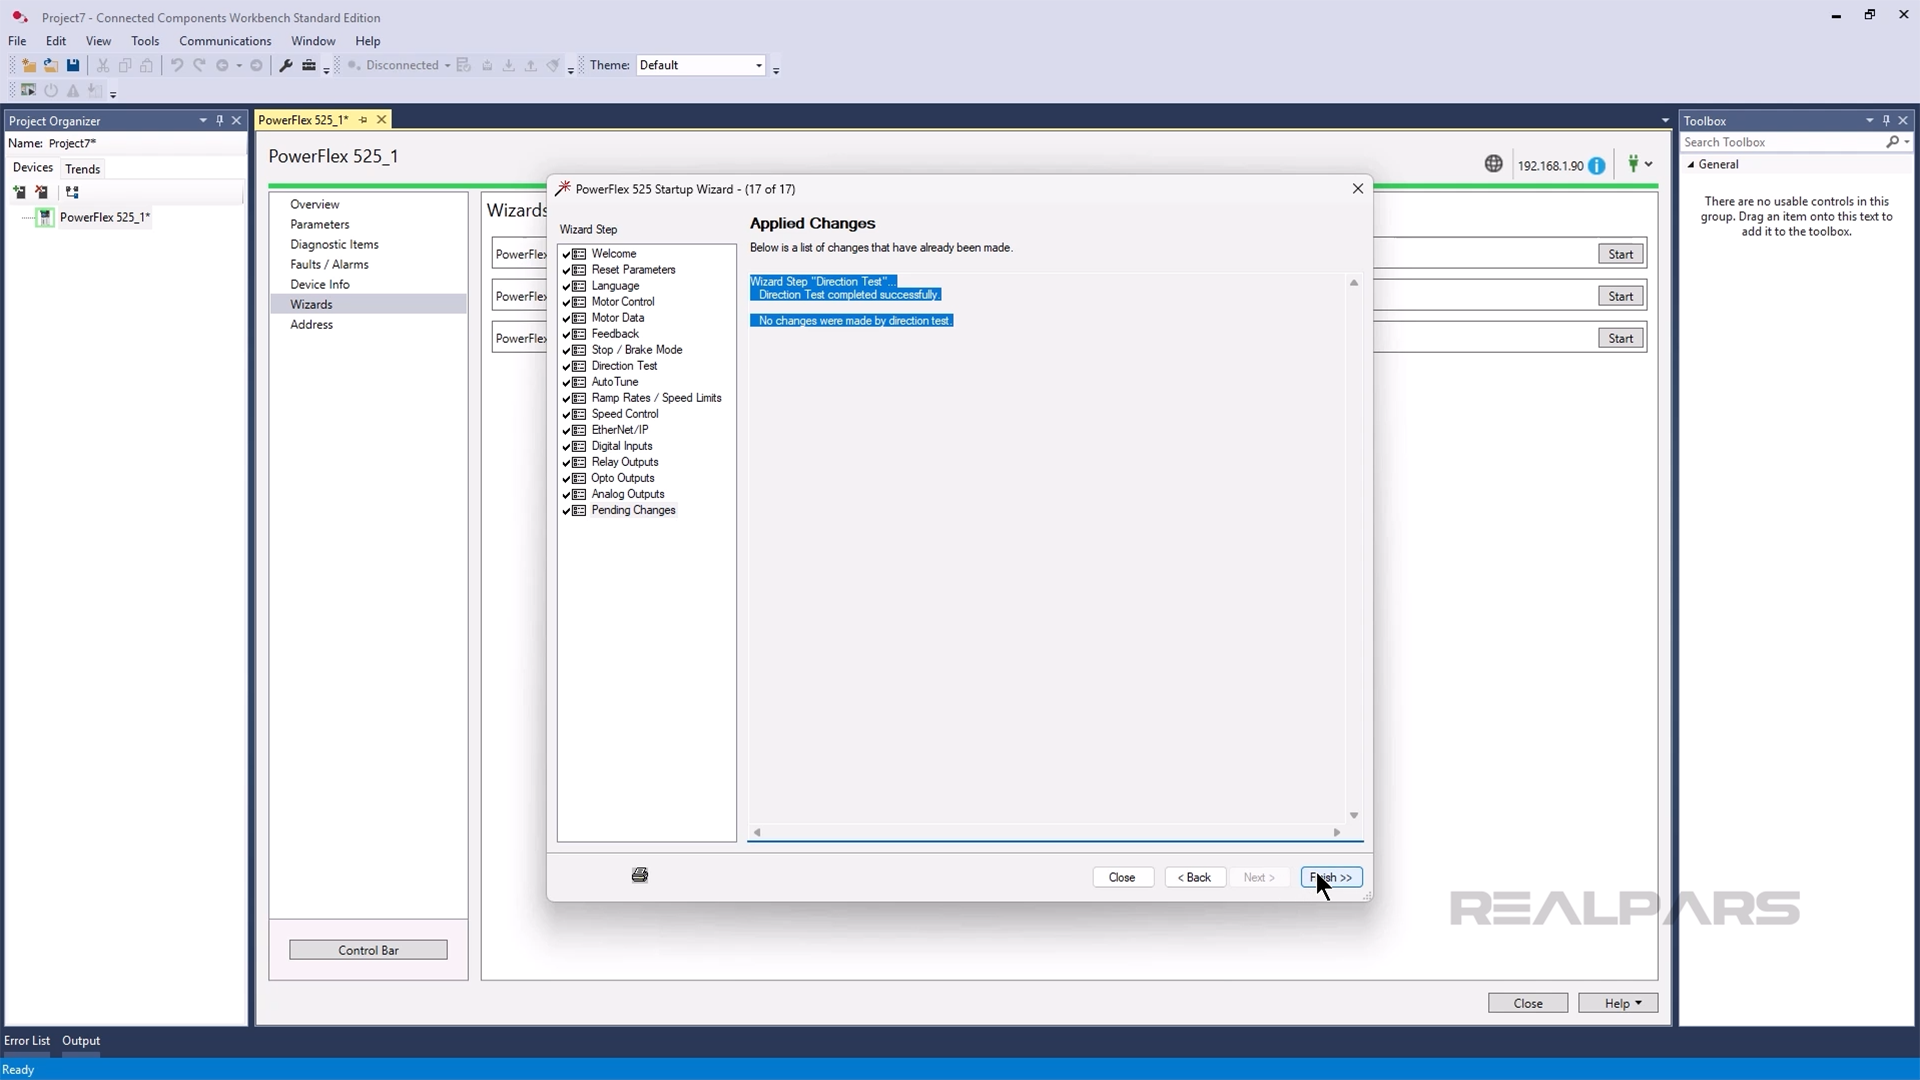
On the last step of the wizard, you can review any changes that were made while you walked through the wizard. Finally, you can click Finish to send the changes to the drive.
Wrap-Up
Now the drive is configured and ready to be integrated into a control system. We’ll look at how to integrate a PowerFlex drive into a micro control system in our next article.